22 posts tagged with "API"

View All Tags

Fork and contribute to the API

· 3 min read
Marco Pellegrino
Nerd Structural Engineer

Fork and clone

GitHub Desktop provides a user-friendly way to collaborate on open-source projects without needing to use complex command-line commands. Here’s a step-by-step guide to contribute to an open-source project using GitHub Desktop, along with visual references from the images provided.

  1. Fork the Repository

    Navigate to femdesign-api repository and click on Fork.

    grasshopper

    Forking creates a copy of the repository in your GitHub account where you can make changes. From the second image:

    grasshopper

    Select your account and give the forked repository a name (you can use the default). Click Create Fork.

  2. Clone Your Fork Using GitHub Desktop

    grasshopper

    Once your fork is ready ,go to your forked repository on GitHub, click the green Code button, and choose Open with GitHub Desktop.
    If GitHub Desktop isn’t installed, you’ll be prompted to download it.
    Select a folder on your local computer where the repository will be cloned.

    Your repository is now ready for editing on your local machine.

  3. Create a New Branch for Your Changes

    To avoid changing the main branch directly, create a new branch.

    In GitHub Desktop, go to the top bar and click Current Branch. Select New Branch, give it a descriptive name (e.g., update-material-docs), and click Create Branch.

    grasshopper

    Now you’re ready to make changes.

  4. Make Changes to the Project

    Open the .sln file within the cloned repository folder in your preferred code editor (Visual studio is the recommended for this project). Edit the files or add new features.

  5. Commit Your Changes Locally

    grasshopper Return to GitHub Desktop, where you’ll see a summary of your changes under the Changes tab. Write a short, descriptive message about what you’ve done in the Summary field (e.g., “Updated Material.cs to fix bug”). Click Commit and then push.

    This saves your changes locally in your branch and uploads your changes from your local branch to the corresponding branch on your forked repository in GitHub.

  6. Create a Pull Request

    grasshopper

    On GitHub, navigate to your forked repository and click the contribute -> open pull request.

    Fill the information in the pull request template, including a title and description of your changes.

Reference the Development branch

If our API is missing certain functionality needed for your project, you may require additional support or development from our team. In such cases, using the development branch is highly beneficial, as it contains the most up-to-date version of the API. This allows you to access new methods and implementations before their official release. To do so, you can switch to the Dev branch (typically identifiable by a _Dev suffix) and reference the API from there.

Instead of referencing the API through NuGet in your project, you can link it directly via the .csproj file. This approach ensures that when you update or fetch the API repository, your project will automatically incorporate the latest version.

grasshopper grasshopper

I hope this guide was helpful. If you have any questions, feel free to send a message to the community page.

Create custom C# component

· 4 min read
Marco Pellegrino
Nerd Structural Engineer

FEM-Design API is a dotnet library that can be run inside Grasshopper. Our toolbox is intensively develop and you get access to 99% of our functionality/methods.

However, there are cases where writing our own code reduce the amount of components to use and speed-up the maintenance of the code.

How do you do it? Well. I am here to get you covered. Let's start!

Our goal is to be able to create the object PeriodicDiagramRecord which can be found in FemDesign.Core.dll

record

FEM-Design Periodic excitation table

public PeriodicDiagramRecord(string name, double frequency, List<PeriodicCase> cases)

where PeriodicCase is:

public PeriodicCase(double factor, Shape phase, LoadCase LoadCase)

and Shape is:

public enum Shape
{
Cos,
Sin,
}

The step to follow will be described step by step below:

  • place an empty C# component on the canvas

step-1

  • right click on the component and select Manage Assemblies...

manage-assemblies

  • Add FemDesign.Core.dll. If you have install the API through package manager, look for the folder where Rhino install the plug-ins. (C:\Users\XXX\AppData\Roaming\McNeel\Rhinoceros\packages\7.0). Otherwise, you can download the .dll from GitHub.

reference-fem-design-core

  • Rename the input variable and specify the input type.

    name = Item Access - string
    frequency = Item Access - double
    cases = List Access - System.Object

  • Rename the output variable to periodicRecord

components

  • Double click on the C# component and write the code inside private void
var periodicCases = cases.Cast<FemDesign.Loads.PeriodicCase>().ToList();

var record = new FemDesign.Loads.PeriodicDiagramRecord(name, frequency, periodicCases);

PeriodicRecord = record;
  • On the top part of the code editor specify the library to use with using:
using FemDesign;
using FemDesign.Loads;

using System.Linq;

The code on your component should look like the following.

final-component

What the code is doing?

The following section is to specify which tools are necessary to do the job. Think of them as "softwares" that give you some functionalities.

using FemDesign;
using FemDesign.Loads;

using System.Linq;

The next section is where you create the object

var periodicCases = cases.Cast<FemDesign.Loads.PeriodicCase>().ToList();

var record = new FemDesign.Loads.PeriodicDiagramRecord(name, frequency, periodicCases);

PeriodicRecord = record;

name and frequency input variable can be use without any additional code as we have specified them as string and double respectively.

var record = new FemDesign.Loads.PeriodicDiagramRecord(name, frequency, cases);

However, in order to use our variable cases in the code, the object needs to be cast in the object type required by the method. If you remember, we specified the cases input variable as List of System.Object. The Cast method will do the action to cast the object to the right type.

var periodicCases = cases.Cast<FemDesign.Loads.PeriodicCase>().ToList();

You can now use the input and try to create a PeriodicDiagramRecord object.

periodic

You can create name as it is a string, frequency as it is a double. What about cases input?

cases is a FemDesign.Loads.PeriodicCase object and, therefore, you need to create a different component.

public PeriodicCase(double factor, Shape phase, LoadCase LoadCase)

Try to follow the step as you have done before.

periodic-case-comp

  • input type

    factor = Item Access - string
    shape = Item Access - System.Object loadCase = Item Access - System.Object

var oShape = (FemDesign.Loads.PeriodicCase.Shape) Enum.Parse(typeof(FemDesign.Loads.PeriodicCase.Shape), shape);
var periodicCase = new FemDesign.Loads.PeriodicCase(factor, oShape, (FemDesign.Loads.LoadCase) loadCase);

PeriodicCase = periodicCase;

LoadCase is something that it has already been implemented in Grasshopper so you can use the already made component without creating a new one.

workflow

Congratulations! You have finally created your own workflow to create a PeriodicExcitation object in Grasshopper :)

You can download the Grasshopper definition used in this tutorial from here 👉Grasshopper Definition

Modify element with Python

· 2 min read
Marco Pellegrino
Nerd Structural Engineer

One use case where the API is leveraged is the modification of some of the properties of an object such as Slab, Bar, Axis ect ect.

The "Grasshopper way" to modify an object requires to create a new one starting from the properties of the deconstructed object and insert the new values where needed. The example below shows how to modify the thickness of a Slab.

construct-deconstruct

However, there is a better/improved/faster way to do modify properties. It only required few knowledge of programming and it is my favorite way to manipulate data inside the FEM-Design model.

Let's say that we want to modify the thickness of a slab and the identifier of a beam of an existing model.

The step to follow are:

  1. Create a python component
  2. Add the required input for your script. Zooming in the python component will allow you to add as many input as needed.
  3. Right click on the generated input in order to change the name and set the type.
  4. Write your code to modify the properties.

python

Bar example

import copy

import clr
clr.AddReferenceToFileAndPath(r"C:\Users\Marco\AppData\Roaming\Grasshopper\Libraries\FemDesign\FemDesign.Core.dll")
#You must reference the FemDesign.Core.dll using the location on your machine


new_bar = copy.deepcopy(x)
new_bar.Identifier = identifier

One of common mistake when modifying object in Grasshopper is NOT doing the copy of the object that we want to modify. The copy will kind of detach the original object from the new one so that the modification will not be upstream.

After the copy, we need to find the properties to modify navigating through the object with the use of character .

new_bar.Identifier = identifier is selecting the Identifier of the new_bar and it is setting the identifier to it.

Slab example

import copy

import clr
clr.AddReferenceToFileAndPath(r"C:\Users\Marco\AppData\Roaming\Grasshopper\Libraries\FemDesign\FemDesign.Core.dll")
#You must reference the FemDesign.Core.dll using the location on your machine

new_slab = copy.deepcopy(x)

new_slab.SlabPart.Thickness[0].Value = tck

The slab example is basically the same but, due to a different data structure, we need to select a list item and set the value to it.

You will end up in really clean workflow which will not scare people and easy to maintain :)

gh-workflow

You can download the Grasshopper definition used in this tutorial from here 👉Grasshopper Definition

2L sections

· One min read
Marco Pellegrino
Nerd Structural Engineer

grasshopper

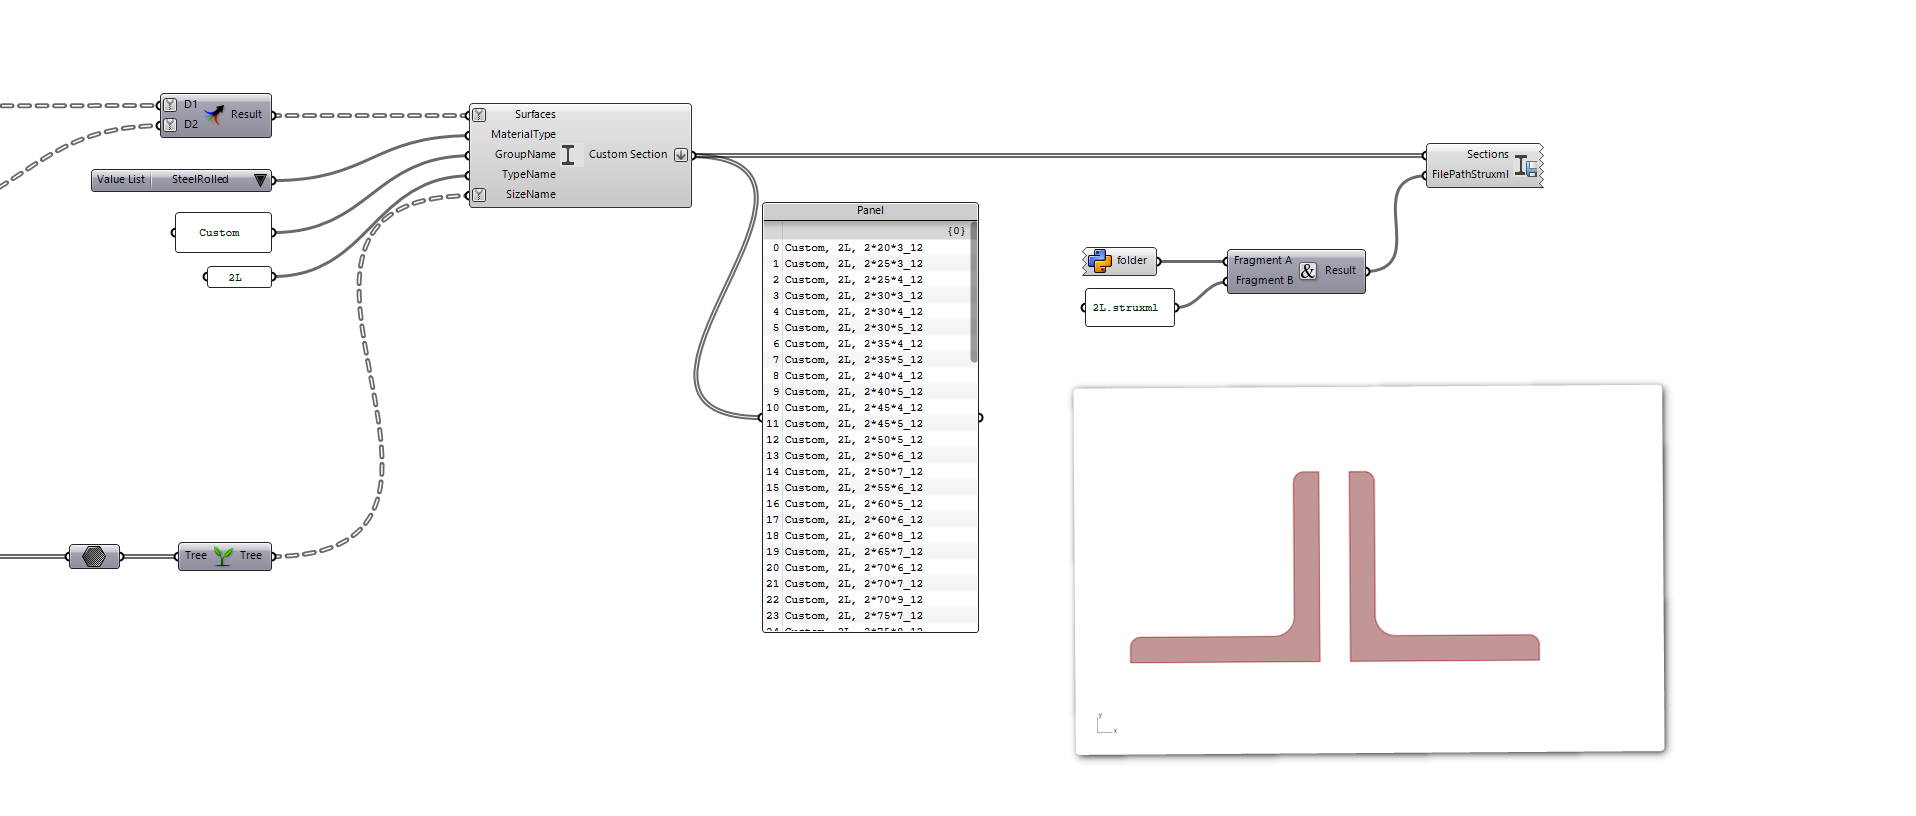
Double sections such as 2L are widely use in steel structures but, unfortunately, FEM-Design does not ship these kind of geometries out of the box.

However, with some few steps and the API, you can create a custom library that you can use over and over again.

Let's try to summarise the steps first.

  1. Select all the LE shape sections from the Database

step_1

  1. Apply a mirror transformation to the section surfaces. In our case, I have applied a mirror at a specific distance which represent the space between the L shapes.

step_2

  1. Construct a custom section specifying GroupName, TypeName and SizeName. The input will be used by #FEM-Design as shown in the picture below.

step_3

group

You can now import your brand new pool of sections in FEM-Design!

I have already talked about custom section and you might be interested in reading this blog post.

You can download the Grasshopper definition used in this tutorial from here 👉Grasshopper Definition

Iterative analysis

· 2 min read
Marco Pellegrino
Nerd Structural Engineer

grasshopper

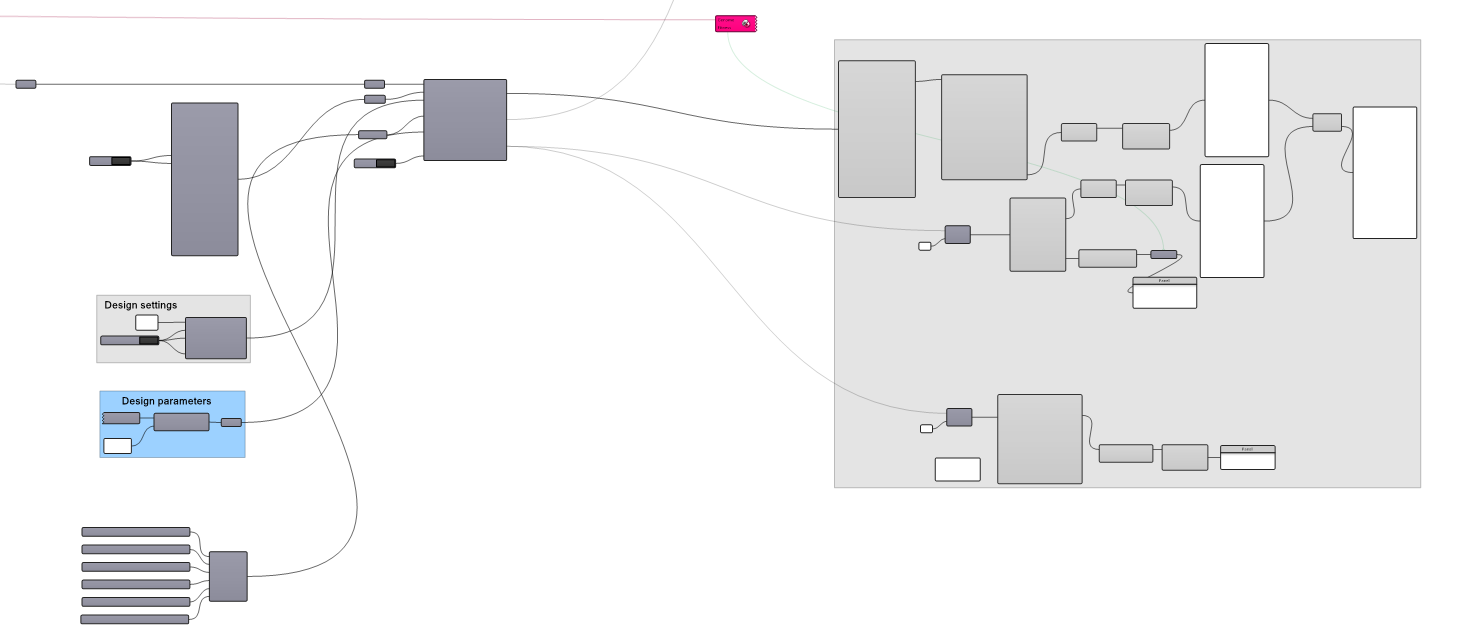
One of the most fascinating topics in the application of parametric design in engineering is optimization. It's hard to find an engineer who works with Grasshopper and hasn't tried their hand at optimizing using Galapagos. This process can often be quite straightforward as we can obtain real-time outputs like mass, deflection, and utilization by adjusting various parameters.

So, how do we go about it? The following example should help illustrate the setup:

  • the analysis (static analysis)
  • the design settings (check, auto-design, apply changes)
  • the design parameters (utilisation)

Design settings and parameters

grasshopper

Design parameters are currently linked to a text file. The cfg.xml file template can be found in the plug-in folder installed by Package Manager in %AppData%\McNeel\Rhinoceros\packages\7.0\FemDesign\

The file has several parameters that you can modify as you pleased. In case of steel bars, you can use something like the following:

<?xml version="1.0" encoding="UTF-8"?>
<configs>
<CONFIG fIgnoreAnnexForShearStrength="false" StripeWidth="1" type="CCMSCONFIG"></CONFIG>
<CONFIG type="CCCOCONFIG"></CONFIG>

<!-- EUROCODE STEEL CONFIG -->
<CONFIG sInteraction="0" type="ECSTCONFIG"></CONFIG>

<!-- DESIGN PARAMETERS STEEL BAR -->
<CONFIG LimitUtilization="0.8" type="CCDESPARAMBARST" vSection_itemcnt="24"></CONFIG>

<!-- EUROCODE CALCULATION PARAMETERS STEEL BAR -->
<CONFIG aBucklingCurve_fx1="-1" aBucklingCurve_fx2="-1" aBucklingCurve_ltb="-1" aBucklingCurve_ltt="-1" aBucklingCurve_tf="-1" CheckResistanceOnly="1" class4Ignored="1" convergencyratio="1" fLatTorBuckGen="1" fLatTorBuckGenSpecForI="0" maxIterStep="50" plasticIgnored="0" rStep="0.5" s2ndOrder="1" type="ECCALCPARAMBARST" UseEqation6_41="0"></CONFIG>
</configs>

FEM-Design will be instructed to apply those settings and the design will reflect the parameters.

You can download the Grasshopper definition used in this tutorial from here 👉Grasshopper Definition

📝 Download FEM-Design API
🌍 Documentation

Leverage interaction surface

· One min read
Marco Pellegrino
Nerd Structural Engineer

grasshopper

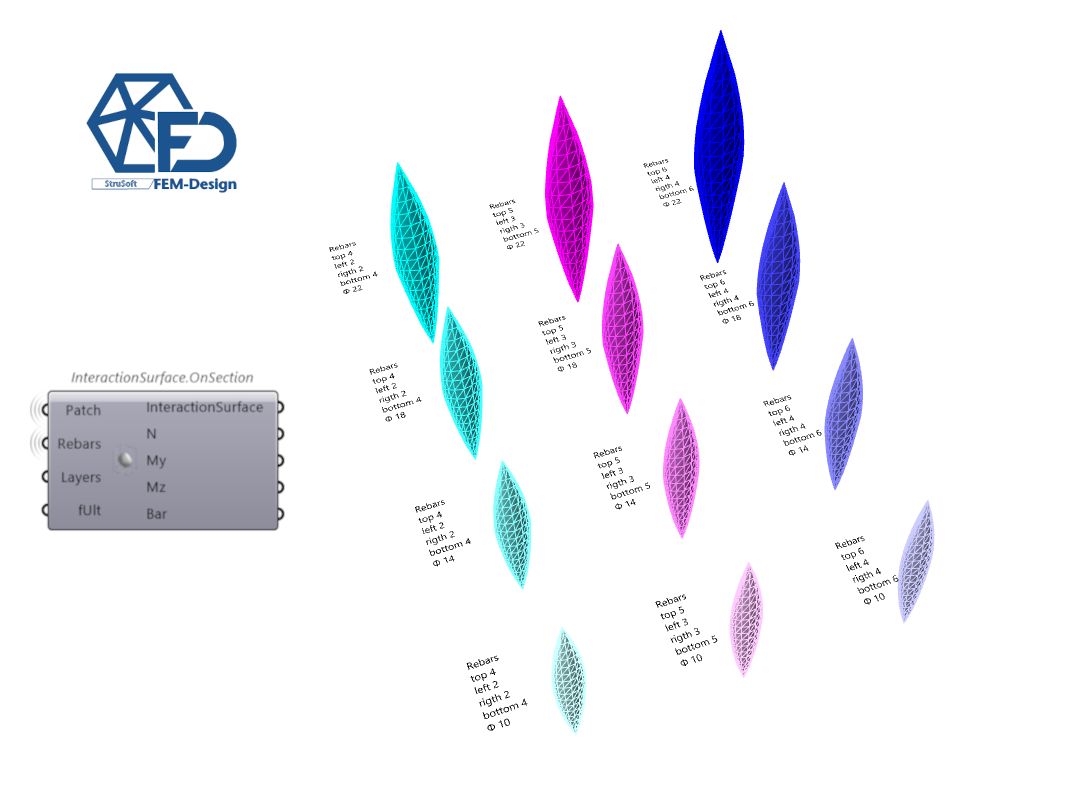
While preparing a webinar regarding FEM-Design API by StruSoft together with Isak Björhag, we have got the idea to showcase how the engineers can use our tool to optimise the selection of a cross section with the help of some grasshopper spaghetti 🍝

The outcome was really fascinating as I have never seen several interaction surface together and I have never noticed the effect of the parameters on the final capacity 👀

Visualisation is definitely a key aspect. Our eyes are not been "constructed" to understand a lot of numbers together

You can download the Grasshopper definition used in this tutorial from here 👉Grasshopper Definition

📝 Download FEM-Design API
🌍 Community

Export results to csv

· One min read
Marco Pellegrino
Nerd Structural Engineer

grasshopper

FEM-Design API is mostly developed to give users access to most of the model data. We believe that users should not be constrained by our idea of engineering, but they should have the freedom to manipulate the data in a way that works best for them!

FEM-Design, the main software, has a really pleasant user interface that exports all the results with good logic.

However, the API will give you the freedom to nest/manipulate the data in any way you want and export it with a small script. In the picture above, I have shown how straightforward it is to save some data to a text file.

You can download the Grasshopper definition used in this tutorial from here 👉Grasshopper Definition

📝 Download FEM-Design API
📰 Newsletter
🌍 Community

Dev meeting 22.7.0

· One min read
Marco Pellegrino
Nerd Structural Engineer

grasshopper

We hope that everyone enjoyed our recent webinar and we are delighted to provide you with access to all the content!

Download the Grasshopper definitions used in the meeting from here 👉Grasshopper Definition
Download the pdf presentation used in the meeting from here 👉pdf presentation

Below, you can find a quick preview of what it has been discuss.

grasshopper grasshopper grasshopper grasshopper grasshopper grasshopper grasshopper

📝 Download FEM-Design API
📰 Newsletter
🙋 Community

Any geometry to slab

· One min read
Marco Pellegrino
Nerd Structural Engineer

grasshopper

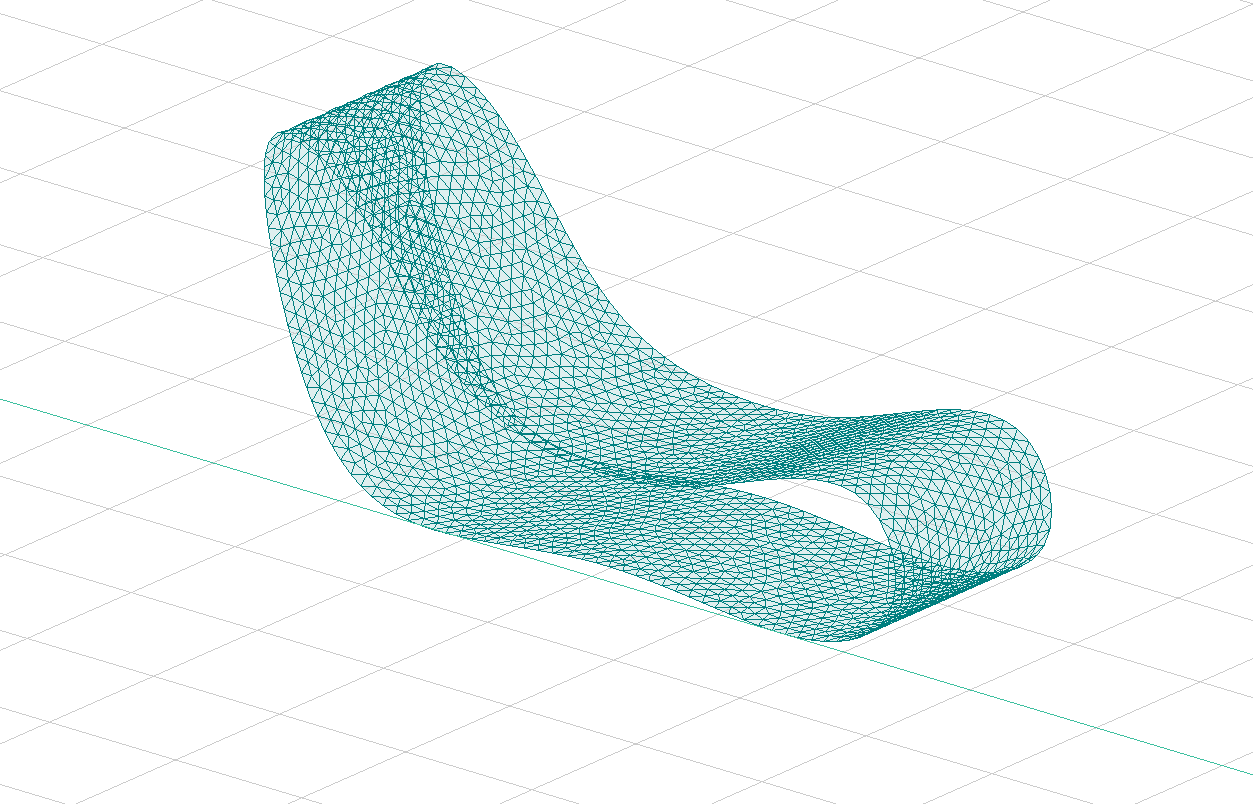
I recently came across an interesting case from one of our users who was trying to analyse a free-form surface.

FEM-Design is mostly use for slab and wall (both geometry are flat) but the user needs the software to calculate something different. Something that it is nowadays called "free-form"!

How can we overcome the issue?

Discretization is the key concept! What you can do, it is to subdivide the surface in several small triangles and feed FEM-Design with those.

grasshopper

You can download the Grasshopper definition used in this tutorial from here 👉Grasshopper Definition

📝 Download FEM-Design API
📝 Download StruSoft Trial Version
📰 Newsletter
🙋 Help

Hex Dome

· One min read
Marco Pellegrino
Nerd Structural Engineer

grasshopper

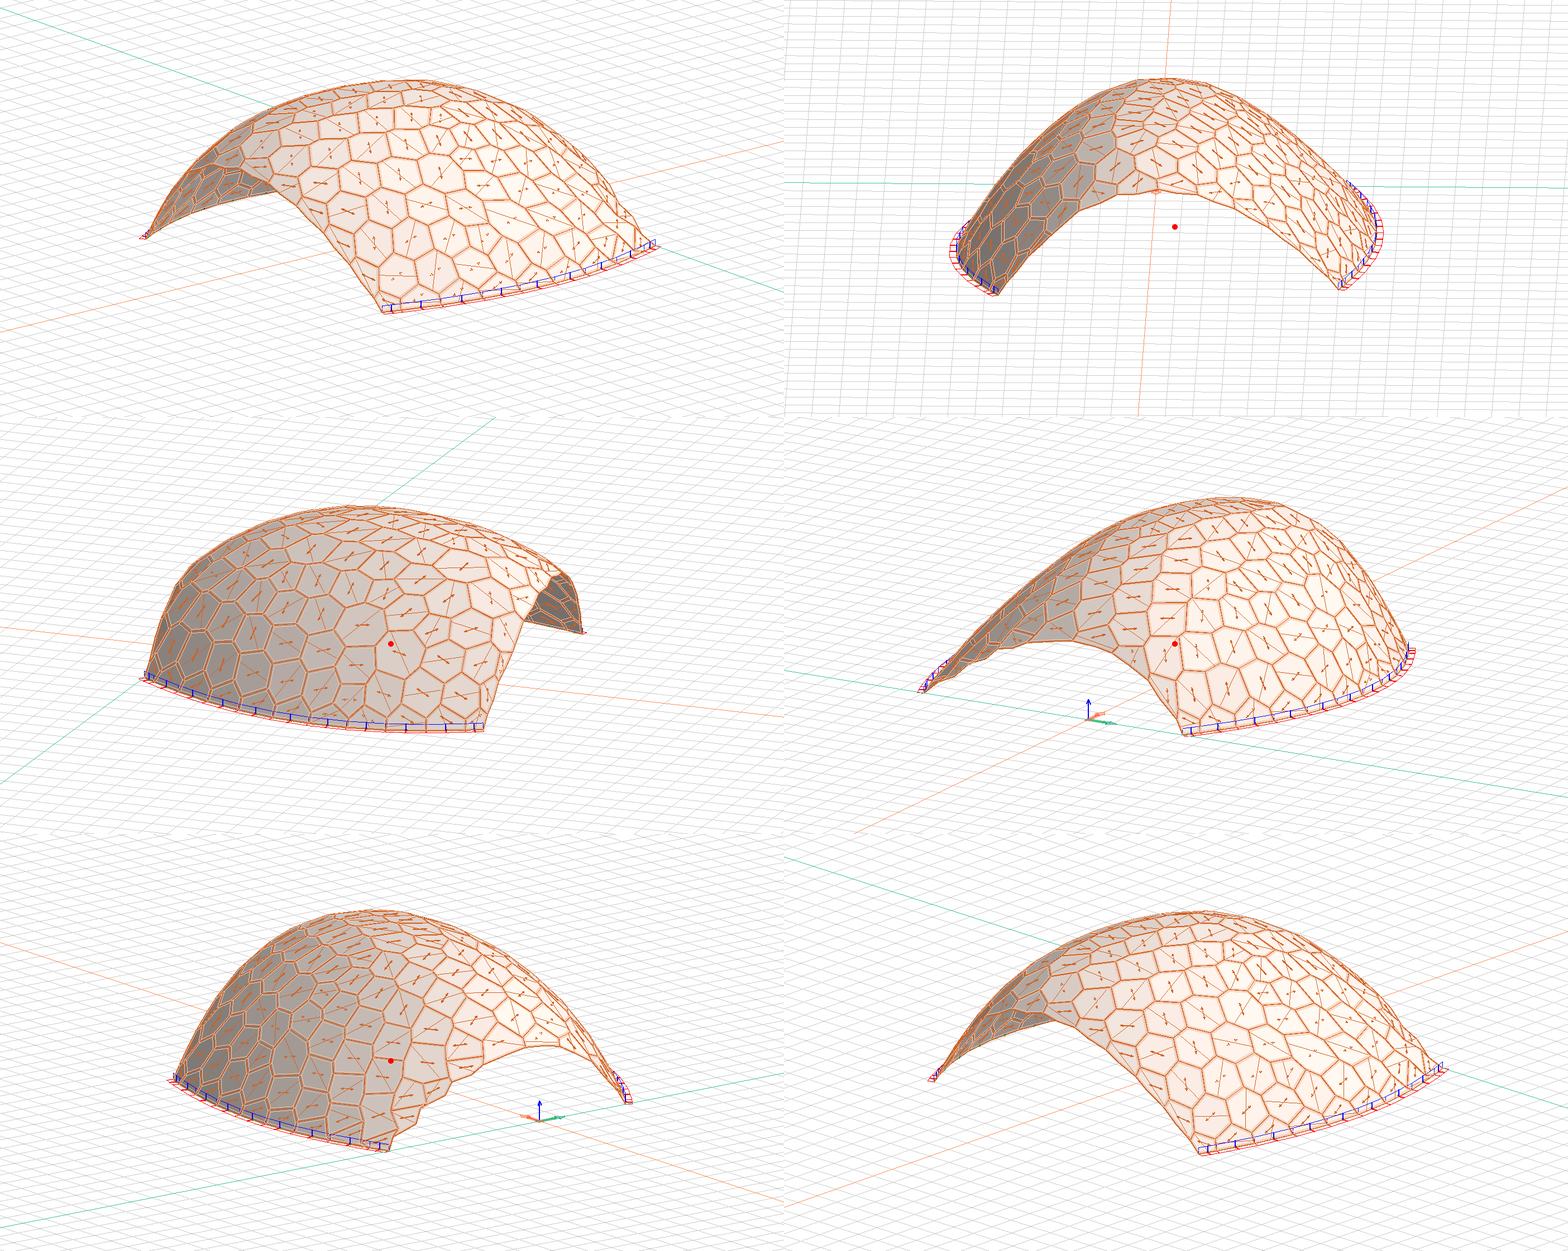
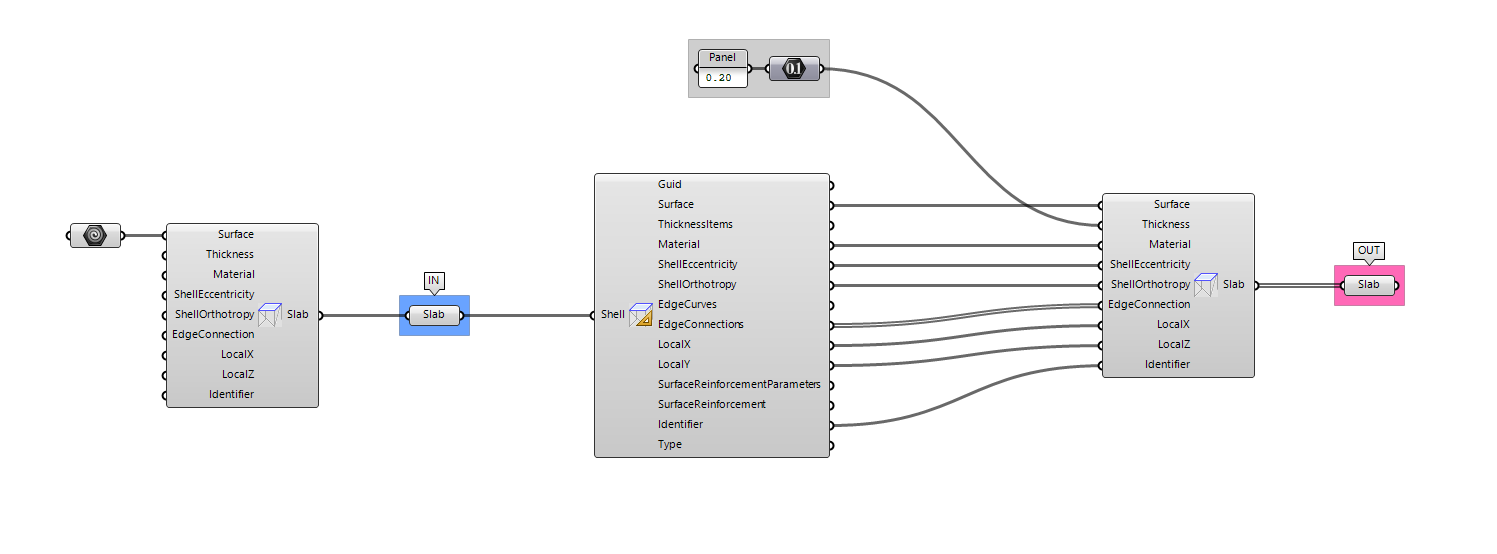
I want to share some insights on optimizing the direction of CLT Panel wit FEM-Design API by StruSoft. 🧐

When designing CLT panels, one of the key considerations is ensuring that the panel is placed in the right direction to enhance the slab's strength and durability.

But how can we make such models without becoming crazy? 🤯 FEM-Design API has the solution for you.

Do you think that the structure that I have shown is pure theory? 🙄 Have a look at Format Engineers.

PS: Have you noticed the n-gon planar panels? 🤓

You can download the Grasshopper definition used in this tutorial from here 👉Grasshopper Definition

📝 Download FEM-Design API
📝 Download StruSoft Trial Version
🙋 Help